PAINTING FACES, FIGURES, FROM PHOTOGRAPHS

To Do or Not to Do, That is the Question

Every painter knows there are pros and cons to painting from a photograph, especially when painting a face or figure. Most master painters know beginners do not do so well, working from a photograph. Most know that the only way beginners get a good start is from a photograph. It’s the typical Catch 22 problem to solve when launching out into portrait painting.

With this in mind, I am writing this article: (1) to outline the opportunities one has in painting from a photograph or live model, the times one can choose, (2) to specify the times it is best to work from a model, (3) specify the times best to use photographic reference, (4) to list the obvious, as in times one can only work from a photograph, and (5) to point out photographic errors one should ignore and revisit. This will not be all-inclusive, I’ll tell you from the get-go. This will be an introductory pass at a a very deep subject. To be very fair, I must say that the masters prefer to err on the side of painting from life. This viewpoint is that of the Portrait Society of America with which I have been associated 8 years or more, including attending their annual conference.

This is the viewpoint of masters with whom I have contact, as well, such as Virgil Elliott, a master portraitist I met at the PSoA conference, who is a guru of oil painting and author of the textbook on completing portraiture entitled Traditional Painting, Advanced Techniques and Concepts from the Renaissance to the Present. Attach link to: www.goodreads.com/book/show/595646.Traditional_Oil_Painting.

1.Opportunities: Shall I get a live model, or use a wonderful photograph?

By far the best opportunities for working from a live model are in workshops where at least one day offers painting from a sitting model. These courses are usually week-longer’s and are very pricey. If you have chance and money, go for it once a year. Once you are home from the experience, write up everything you have learned. Teaching can be actively mined for decades afterwards, but it must be actively recalled and used to qualify.

Take your sketchbook with you everywhere you go. It helps to have a reputation as an artist to give you the nerve to whip out a sketchbook, but go ahead, and it will work both ways. Sketching will build your abilities and your reputation as an artist.
In portrait conferences like the Portrait Society of America’s annual which I have attended 7 or 8 times, topnotch models are hired for a multiplicity of the sessions, of which I take every single possible advantage, even the paint-out session at the beginning which has 6 to 8 models to choose from or change up and do quick sketches. You’re already paying, so get your money’s worth.

Harass your family when they are sitting or sleeping or doing any minimal activity that keeps them relatively still for a half hour or more by whipping out your sketch book and sketching them.

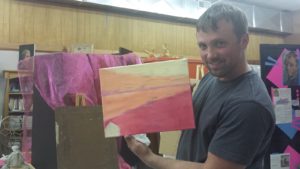
When no one presents themselves to your studio or your near presence, pull out a photograph, preferably one of your own, and go at it. You don’t have to have your $2-grand easel set up for this; one piece of hardboard will lean on anything and you can tape the photo to it. Have your sketch bag ready and filled up with pencil sets and watercolor tin.

2. Times Best to Work from a Model.
When you are doing a portrait, it is always advisable to invite the model in. I do this for startup sessions, at mid-point, and at the conclusion of the work. If the personage is retired or available for longer stints of time, by all means, set them up for 3-hour sessions. When you want a quick portrait, and you are working outside, pull in any willing body and start sketching with brush and paint. Always, if you can manage that, it is the preference.

3. and 4.Times to Pull Out the Old Photo.
* When the subject is dead (set up manikins to supplement).
* When the subject lives on another continent.
* When the subject lives too far away for frequent side trips.
* When the subject is a baby.
* When the subject is a wiggly child, especially a 2-year-old.
* When the subject always scowls and you have one photo with a pleasant look.
* When the subject is a nervous dog.
* When the subject is a racing horse.
* When you like. However, just know that it will only be as good as the amount of expertise you have under your best.

5.Photographic no-no’s, or what to avoid when using a photograph.

Using someone else’s photo without permission, unless you sign their name with a slash and your name on a non-commercial basis.

Using someone else’s photo even with permission in a juried art exhibit. The composition must be your own.

First,and most obvious in the list of what to avoid might be transcribing, or point-by-point transference of a photograph with a grid, like so many artists are taught to do. They always look fake and wooden to me. Unless the artist is already good at three-dimensional drawing, in which case, it could be stupendous (which means they really didn’t need it, anyhow, except as you would use a mirror or walk a distance away).

The second thing evolves out of this and would include distortions, especially those caused by foreshortening, as in when the face is nearly on top of the camera lens, or the subject is in a tree house and the foot is in your face nearly covering his whole figure, things like that. This might be a good opportunity to mention that I have a book on drawing faces in pencil. (

That leads to a third ‘no-no.’ Sometimes the most pleasant faces are smiling ones, and I have to slap myself every time to not paint a portrait with a grin in it. I know I mustn’t, but those snapshot moments just keep enticing me. I don’t have my fellow professionals’ love for lack of personality, the back of a head, the downcast look which I always suspect is because they can’t paint eyes very well. I prefer a model with a pleasant look, anywhere from a Mona Lisa smirk to a full inner smile. I have done a couple with big, toothy smiles, but then, I’ve learned how to paint teeth and want to show that off. Teeth are very telling in the likeness of a face and small differences are really big. Still, in the world of portraiture, teeth are best avoided.

Shadowing is another danger zone in photographs. Hard shadows should are the mark of a rank beginner who has not learned a shadow begins with a hard edge and slowly fades to nothing. One must really apply the Old Masters’ squint technique to gain a sense of proportion, based on knowing the 10-gradient gray scale and how to apply that to the shadows you see. Photographs flatten altogether which hardens shadows with lines which don’t exist. You must have learned how to grade a gradient shadow on round surfaces or do a cast shadow moving away from round surfaces. Shadows begin with a line and end with none, is just one for-instance. It is amazing how soft the shadow wrinkles on a 95-year old are. They are never the black lines which beginners pass off as being Old Masters when they are really New-Beginners-Without-Teachers’ looks.

Another insight I got in doing the last portrait of a no-longer-living person was in portraying flesh colors. 
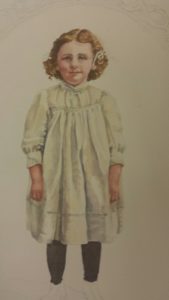
All colors translate into grey tones. These greys are frequently translated back from a photograph into colors containing blue or green, which darken areas more than they should. Going softer and pinker in flesh tones adds to the look of a living child. Key to this might be that red copies as black.

Cast shadows can also be a problem, as in just behind the subject on a wall. I find these best to avoid altogether, but if you must, do way less than you think is called for. Much more to be said, here, but–

Misinterpretation of light and shadow is the biggest of all problems, and can pop up anywhere to form an eye, a nose, or an ear incorrectly. There is no cure for this except years of formal training in how to draw the angles of the face, and how to create the correct perspective of a round object or a figure. The best reference book I have is one that shows the face from every possible angle, even up the nose. No one can memorize every possible angle of every possible figure as in a hologram. Light source is important, but tricky.

Proportional figures. There’s not much cure for this over wide acquaintance with figures. I think the cartoon book on Captain Marvel comics is one of the best self-help figure drawing books available, you just need to remember to give a real person the 5 or 6 heads and not the 8-3/4 heads that build a superhero. Photos run rampant all over figures and their proportionality, so accurate physiology is the only cure for this. Having said that, the individual anomalies must be considered. I remember arguing with a student who forgot her snapshot of her grandparents that ears didn’t exist on a cross line as low as the lips, but only to the nose. She insisted. When she brought the photo, boy was she right, and this was of course one of the very differences in the norm which achieved likeness of the pair. Yes, it was true for both of the grandparents. A good figure drawing book I have used in teaching classes is How to Draw Comics the Marvel Way by Stan Lee and John Buscema.

Odd coloring. Don’t insist on using odd colors that just happen in a photograph. For this, you really need familiarity with color, shading in color, and persistence.

Use the largest photo you can find or have made. If it is of a face, then the face should be 4 x 6 inches, approximately.

Use a pho
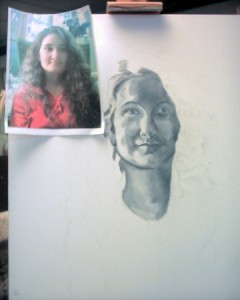
to that has lots of detailed information in it, and not one that is so faded, all the tones are light.

In conclusion, I need to say that you have to use a photograph as though you were a detective. You search for the truth that lies within it. Knowledge plus experience plus training. You can’t get around it, and the smartest thing is not to try, but to avail yourself of practice from life and photos, training from a good teacher, a good self-help book in addition, and time to grow. Jump in wherever you will, but if you short-change yourself in any one of these four directions, you will in some way warp the art product you want perfect.

Learn more »
No Comment

EXPERTS-PRACTITIONERS OPEN FORUM

I wrote this article on request for a restorer working for the University of Delaware creating a public forum for artists to post their questions about the chemical components of art materials and the effects they have on their painting practices. She is now working with such a forum, indispensable to us painters, saving thousands of hours of research. AMIEN was a symposium which disbanded and left a vacuum until now. MITRA, https://www.artcons.udel.edu/mitra

Ever since I turned professional (part of some 40+ years of painting), I have upgraded my techniques and materials. When I send my art students to an art store for supplies, I tell them, “It’s a jungle out there.” Without exception, major questions arise on what to buy in every single arena, whether paints, surfaces to paint on, brushes, mediums, or varnishes.

These trips force questions to the surface which I am not prepared to answer, and not from lack of trying. These choices are not fun ones; they are not cosmetic at all. Once I sold my first $3000 portrait I upgraded my materials and painted it on a Belgian linen canvas. (It had to be restored.) I joined the Portrait Society of America, attend their conference annually, and learned from buying at their kiosk that most of what was sold at major art dealers was craft product, not designed for the serious artist, but for the throwaway market that attracted customers who wouldn’t find them in the 20 years they stayed a-float to complain. As I continued to find expert resources I drained every bit of information I could contain from them and upgraded further, swimming through masses of conflicting data and input, through purchases of shoddy to great materials, and never knowing which was which. I have one book I refer to above all others for expert advice. The old books, like Meyers, have been superseded and outdated by current product and understanding.

My knowledge grid is now one that has wildly divergent arrows which would take up a side wall.

One of my biggest downers as a professional artist was finding out how fugitive my favorite color, alizarin crimson is, and how careful an artist had to be about mixing what I consider all the “pretty” colors.

Had I known oil painting harbored such numerous pitfalls witnessed by the unseen cloud of restorations through the centuries, and was rife with chemical and logical incompatibilities, I might not have braved entry into oil painting at all.

That said, I am a water-colorist as well, which also presents multiple technical problems, but to my mind, not so many.

Here is a recent conversation for you:

Me: I didn’t realize zinc came in acrylic gesso.
Expert: OH WAIT I MISSPOKE MYSELF….I have not had caffeine yet. SO SORRY.
Me: So I’m really at a standstill.
Expert: Zinc in acrylic is FINE, as far as we know.
Me: It just shouldn’t be in oil gesso, or ‘real’ gesso.
Expert: Right.
Me (after further research): But every manufacturer puts this in their gesso.
Expert: Well, yes. It happened once lead, the sturdiest white, was taken off of the market.
Me: So none of my paintings are going to last.
Expert: Unless you affix it to a rigid support… Unless you prime with lead with no zinc in it… Unless you find the one man in the U.S. that does this work… But then you must find the right rigid support, like tin or aluminum or copper or wood panel or hardboard panel.
Me (after researching each one of these): Each one of these has its own problems. And in the end, you can’t get large surfaces ready made anywhere. (Meanwhile, the price of my portraits had just tripled).
Expert: Well, some manufacturers teach you how to attach linen canvas to different surfaces.
Me: So now I’m into time-consuming prep work, expensive courses, and more time. My schedule already stinks, it’s so full. When can I paint?
Expert: Yes. It’s not so hard, once you’re into it.
Me: So, what if I return to fake gesso, acrylic gesso?
Expert: The main concern with acrylic grounds is quality. There can be tons of surfactants and other additives, especially if the company is outsourcing in China.
Me: Dang. One should marry a materials expert.

Take one of the good-guy companies in an area that is fraught with disaster, varnishing, and look at their disclaimer.
“Disclaimer: The above information is based on research and testing done by X Artists Colors, and is provided as a basis for understanding the potential uses in established oil painting and printmaking techniques using the products mentioned. X Artists Colors cannot be sure the product will be right for you. Therefore, we urge product users to carefully read the label, instructions and product information for each product and to test each application to ensure all individual project requirements are met – particularly when developing one’s own technique. While we believe the above information is accurate, WE MAKE NO EXPRESS OR IMPLIED WARRANTIES OF MERCHANTABILITY OR FITNESS FOR A PARTICULAR PURPOSE, AND WE SHALL IN NO EVENT BE LIABLE FOR ANY DAMAGES (INDIRECT, CONSEQUENTIAL OR OTHERWISE) THAT MAY OCCUR AS A RESULT OF A PRODUCT APPLICATION.”

Am I the only artist into whose heart that strikes terror? No.
Expert #1: If the satin varnish has matting agents this will be a problem and could result in a “frosted glass” effect (re-varnishing on top of glossy with a mat varnish).
Expert #2: Yes, actually Expert #1 is right about that. Conservators are able to get away with applying satin (higher molecular weight varnishes) over your average more glossy varnishes (lower molecular weight varnishes) because we make our own varnishes from scratch….There is a dire need to survey what is in all of these proprietary varnishes.
Expert #3: It is zinc in oil that is a problem.

Many of us run right along in total ignorance where angels fear to enter, assuming the seller has OUR INTERESTS AT HEART. My gosh, I remember first learning in my Old Master’s watercolor training in Germany that ox gall, which

dissolves fat in water to prevent oily resists in watercolor, was deadly poisonous. To date, I have never even seen a skull and crossbones on a bottle. Do paints containing cadmium have label warnings? We assume happily the truth of one of the most popular American phrases of the century, “It’s gonna be all right.” And this happens in what the general public would consider more important than how long their painting will last.

“Really?” With luck, perhaps, maybe…. but then, probably not. Who can we trust? Why will manufacturers not tell us what is in their products? Why are so many processes hidden in multiple, indiscernible layers? Why must the consumer roll back middleman after middleman and waste time when a manufacturer could have simply disclosed the materials he used. Why does one of the most reputable sellers going tell a customer, “In all the years I’ve worked here, no one has ever asked that question”? about the exact components in primed canvases and says he’ll take it further after their first hundred or so inquiries. Gee, thanks.

The industry has turned craft instead of artist. The industry does not have long-term vision. The industry is not worried about liability. The industry profits on the artist while BYPASSING THE ARTIST’S NEED TO KNOW AND MAKE GOOD, DISCERNING DECISIONS.

Having seen all of this without a doubt, I would like to proclaim an Artist’s Manifesto:

* We Artists need an independently run forum where we can ask questions regarding materials and techniques.
* We Artists need a platform in which to interact with conservators, scientists, and industry representatives.
* We Artists need help navigating the ever-growing world of commercially available art materials.
* We Artists need to be heard and listened to in every area of art product manufacturing and design.
* We Artists need to KNOW what we’re dealing with.

To do so, we need to be able to ask questions of those with the knowledge base we are crying for, and which we could only navigate if we gave up our own call to paint. Happily that day is here.

Learn more »
No Comment

ART STUDENT Boomerang Effect: Good Technique

When Students Return

Nothing is more gratifying to a teaching artist than a student who asks for more. Sometimes, like Stuart Peregoy, 10-15 years later. Because nothing gratifies a teacher more than getting a second chance to pour expertise into a willing vessel. It’s called leaving a legacy.

So when Stuart Peregoy walked into my studio, I thought it was just to say hello and bring me up on events of his life since school days in the last 16 years or so, like about his getting married to the love of his life and building his first dream home together.

Stuart Peregoy paints warm underpainting in adult art class

Stuart Peregoy paints warm underpainting in adult art class

And that would have been enough. I love my students and have enjoyed more visits than I can count from students who want to drop in and touch bases with me. I laughingly call myself ‘art mama,’ and 35 years of teaching certainly allows for growing new life adventures. But when they come back to drain your art knowledge bank, you are especially appreciative.

Sure, the first time round is great, full of enthusiasm and fun, discovery and direction in drawing in colored pencils, graphite, and pastels; painting in watercolor, oil, and acrylic. I once had a friend tell me she didn’t need lessons, she had taken art in high school. Ha-ha, as if everything in art could be learned in a few easy lessons. “Everything I know in art I learned in kindergarten” sort of concept. That underscores how undisciplined and uninformed our concept is of what’s to be learned in art. hands-in-marriage-stuart

The second time around, a student takes it seriously, first of all. A return student is ‘broken in,’ has a great foundation laid already. They are willing to listen to detailed additions to their knowledge base. They’ve had the appetizer course, and now they are ready for the whole enchilada.

That’s why Stuart jumped right in and decided to go the master student route, pursue the best Old Masters’ techniques of painting. That’s why he knew to value the build-up knowledge being taught by master painters in ateliers that have popped up all across the country to combat the silly originality is everything notion, the low technique trend in art. Originality is not necessarily a good thing; it has to be a good, trained, originality. I cringe say this, looking for someone to slap me for breaking what’s being taught as the First Commandment of Art.

Stuart draws the picture he intends to paint first, skillfully, with full drawing school corrections. This he turns into a grisaille which provides a more sculptural, three-dimensional version of the drawing in black and white. Over this he paints a thin glaze of verdaccio or a neutral green called an imprimatura which gets rid of all the white. Then, and only then, does he begin to paint.

Why paint what you won’t see? you might ask.

The answer is, it determines the outcome.

Is learning to paint harder the second time around? I ask Stuart.

“It’s a lot harder than I thought it would be,” he said.

“Yes, and it’s a lot harder to teach techniques like modeling that grow with you your whole adult painting experience,” Joanna admits. “We are so intuitively good at coming up with variants of our techniques and just whisking and brushing away, that we avoid the discipline of the right approach. Many roads to Rome doesn’t apply as well to the accumulation of specific skills, so you have to have a tough skin to learn, and an endless ability to re-frame the verbal explanation for what to do, for troubleshooting just why it didn’t come out quite the way you wanted it to.”

Example of Underpainting in a Sea-Scape

Using the technique’s stated, he has captured the North Carolina Sea-Scape in this oil painting.

Mrs. Joanna, as her students affectionately call her, teaches all major categories of painting and drawing in her studio, Art on Broad Atelier/j’Originals’ Art Studio and has for over 30 years. She received art training from Art Instruction correspondence art school, from Queens University in Charlotte, from UNC-Chapel Hill, and additional courses from Methodist University, plus the odd courses from traveling New York Students’ Art League teachers and invited jurors in state watercolor exhibits. She is a signature member of two watercolor societies.

But back to Stuart. Stuart has just finished his second painting, a surprise birthday present to his wife, a 12″ x 16″ oil on canvas of his hand holding hers, the sea and beach in the background, rings on their fingers. His first painting was of his dog, Charlie.

Learn more »
No Comment

FRAMING, Part I, Works on Paper Framing Overview

Part 1: WORKS ON PAPER
Every painter wants to frame his or her painting once it’s done. As beautifully as possible. As much within the conventions of the medium as possible, unless, of course, you are after the weird frame of the year award. As a painter who uses several different media, framing my paintings has given me a unique overview that I think will help collectors and students alike understand the measures I take to love up on my paintings by honoring them with a semi-permanent house. I say that because even the best framed pieces are semi-permanent. We just want decades at the least.

Usually, oil painters don’t want to hear about how to frame watercolors, or vice-versa. However, having insider info into several media’s framing requirement needs will help you understand why I chose the frame I did, and what you will be replacing perhaps with inferior quality, if you choose to re-frame. Even hobby artists and do it yourself folks using a shadowbox frame for mementos can profit from this. There are several things to think about when you frame. One is the stability of the art work itself. Another is its beautification or enhancement. Another is the stability of the unit that is the framed art work. And yet another is the identity of the work.

First, let’s describe different art works to be framed and go into what years of experience from framers and artists tell us. The purposes are many–architectural stability, protection from bugs, spacing the work away from the wall and possible moisture, to name a few. This is not meant as a technical treatise; that I leave to experts. However, my advice will give you a general guidance in the best possible directions.

Pencil, colored pencil, pastel, gel pen, pen-ink, watercolor, and even paintings in oil or acrylic on canvas sheets (not stretched or on board). All of these works need similar handling. The framing process for Works on Paper itself must be broken down into four separate areas: Matting, Backing, Framing Material, and Glazing. Let’s look at each one.

A. Matting. All works done onto paper must be matted. Insert pix of Mom’s Magnolias. Besides enhancing and highlighting the work itself, mats separate art work from the glass. The image of the art work, if placed right next to the glass, can affix to the glass itself, an unintended but permanent state of affairs no artist wants to happen. Glass can magnify sunlight’s rays in all forms and fade the picture. All materials used fade if hung in bright sunlight. Mat comes in different qualities–acidic, buffered, neutral, acid-free. I use only acid-free mats, due to the fast deterioration caused by acid to paper fibers, and also due to its yellowing of the work (early stage deterioration). Acid burns, and the burning yellow color causes premature deterioration of the art work. The only variation I use is between acid-free and museum quality. Various techniques include single matting, double or triple matting, float mounting, and separation from the glass by invisible strips carried by every framer and available on request. Added distance between artwork and glass can always be considered a good thing. For the watercolors I paint on beautiful deckled or raw-torn edges, I use the float mounting technique which requires a full mat sheet behind the work of art, and the at-least 3-inch mat in front of it. I actually don’t go below 4″ or 3-1/2″ matting. Besides worrying about the surfaces on which the art work lies, or which lie on top of the art work, you must also be careful how you affix the painting to mat board. Again, we have to go with acid-free tape, most often, linen. You can order this yourself, but if you don’t specify that you want your framer to use acid-free tape. The work on paper needs not to wobble, but should not be attached too tightly, as different climate conditions will expand and contract the piece. For this reason, and to limit the affected area, a hinge system is used at the top of the work, with only strips holding onto the paper by the acid-free glue on the linen strips. For the process, see source below! This keeps the work in place but expandable so it doesn’t bow and warp from being taped all around four sides, a practice that should NEVER be done.

A few words about color. Mat colors fade. White, grey, off-white, don’t and even darker neutrals don’t look bad slightly faded. Color does. Less is more. You shouldn’t have to enhance to make your work shine. Do, however, choose even your neutrals for nuance of tone. Photo-white is my all time favorite–not too yellow, not too grey. Almost white.

B.Backing. Acid-free foam core of various thicknesses protects and adds stability to the architectural sandwich. It lends stability to the wooden or gallery frame (metal), as well, countering the stress points of such a flat unit. If you use metal or gallery frames, you will use no further backing material, as the design does not allow it. Tension strips of metal come with the frame to press the unit tighter together. This prevents torquing as well as the introduction of bugs into the unit. That being said, bugs will get in, somehow, and is no sign of neglect by either artist or gallery owner. Gallery-framed paintings need to be refreshed every so often, but if you change any of the elements, you MUST INSIST on acid-free components. If you value your art work at all, pick a reputable framer who knows his stuff, and the lady you know will not sneak in shortcuts. Ask for explanations at the point of service. If they don’t know enough about it, you will get a skimpy or curt answer, and you can look further for your framer. If you are a diy person, examine all your materials from the art supplier to be sure they are what is claimed. Make them say it is acid-free.

If you frame your work on paper in a wood or wood-substitute frame, you will add an additional step to your acid-free foam core. Once the backing is stapled in place (this is NOT a framing primer), you will need an acid-free sheet of paper to glue from side to side on the back of the wood, continuously. Read: no gaps in glued surface for living things to enter.

C.Glazing. Strange word. It is simple one step more general than glass. Because you can use glass, or you can use Plexiglass, or maybe there’s something else I don’t know about. However, I use Plexiglas on all my watercolor paintings, as that is the only way they are accepted and received from shows. No one wants blood liability on the artwork from shattered glass in transit. So if my customer prefers glass, that’s his chance to ante up and refresh the package, if not the individual elements. Remember, you can get any number of UV-ray controlling exemplars of glass and Plexiglas. It’s best to choose a framer who has a picture of what it looks like under the type of either glass or Plexiglas they are offering so you know how it will look. Some non-glare glass actually greys down a watercolor, and that is something you really don’t want. Plain glass allows for more light play. Treated glass may give additional protection. Weight it out; it’s a personal decision. If you opt for no protection, don’t put it facing a south oriented window to fade away in the blazing sun.

D.Frame Material: metal (gallery), wood, synthetic wood, rigid liner mats, whatever. First, let’s discuss gallery frames or metal framing, which come in a variety of shapes, sizes, profiles, and dimensions. Metal frames are a dream for the do it yourself-er. You can assemble all of the parts yourself even without instructions, intuitively, like I do if have to. There are hinges which hold the corners together, and the four sides have come to you custom cut. There are tension spacers to hold the inner packet together without extra space. If you get a deluxe rounded profile, the total looks smart enough to accompany antiques in a classical or traditional style house. These are the preferred choice of painters who enter watercolor society shows.

However, wood or its substitute is also a choice. For works on paper, since you have a generous (I stressed this, earlier) spacing around your work, you don’t want to go furniture store style and over-burden your piece of art with extra curlicues and show-off gilded pieces, and a very wide profile. Watercolor and other works on paper frames should traditionally be thinner than those used for oils and acrylics. However, they can be modern or classical, plain or played up. Remember the principle of less is more? You don’t want to give anybody the impression that your art work is lacking so you make it up by adding too much show-off stuff around it.

Have fun! For a variety of framed works on paper framed effects, look at both my paintings for sale in the watercolors and gel pen categories on my website.

Source: http://www.logangraphic.com/blog/mount-watercolor

Learn more »
No Comment

FRAMING, Pt. II, Stretched Canvas and Boards

In and Out, Stretched Canvas and Boards Overview

Part 2: WORKS ON CANVAS AND BOARD
Every painter wants to frame his or her painting once it’s done. As beautifully as possible. As much within the conventions of the medium as possible, unless, of course, you are after the weird frame of the year award. As a painter who uses several different media, framing my paintings has given me a unique overview that I think will help collectors and students alike understand the measures I take to love up on my paintings with their semi-permanent house. And no matter how fine the house, it is not permanent, even when we hope for decades or centuries of permanence.

Usuually, oil painters don’t want to hear about how to frame watercolors, or vice-versa. However, having insider info into several media’s framing requirement needs will help you understand why I chose the frame I did, and what you will be replacing perhaps with inferior quality, if you choose to re-frame. Even hobby artists and diy folks using a shadowbox frame for mementos can profit from this. There are several things to think about when you frame. One is the stability of the art work itself. Another is its beautification or enhancement. (Add newly submitted photo of Harvest with full frame) Another is the stability of the unit that is the framed art work. And yet another is the identity of the work.

First, let’s describe different art works to be framed and go into what years of experience from framers and artists tell us. The purposes are many–architectural stability, protection from bugs, spacing the work away from the wall and possible moisture, to name a few. This is not meant as a technical treatise; that I leave to experts. However, my advice will give you a general guidance in the best possible directions.

Stretched canvas really doesn’t have to be framed if it is on gallery wrap. That’s the reason it was created. That having been said, frames protect. After the cutting edge and modern effect is done, the impact worn off, the edges scuffed and whitened and your surface touches the perhaps moist wall and grows a coat of mold which you may never fully get rid of. I prefer to frame. In 30 years, I have only just come upon one large watercolor show which requires wooden frames in order to be accepted. For that case, you need to read the first article on this subject as well. Even paintings in oil or acrylic on canvas sheets (not stretched or on board) must be handled like works on paper, unless PVC-glued to a rigid surface.

A. Matting. For rigid painting surfaces there are mats as well. However, they aren’t the same kind as for works on paper, which have paper mats. This is not necessarily obvious. I have had students frame for shows and add a paper mat to a stretched canvas in a wooden frame without glazing (glass or Plexiglas). Not good. No rhyme or reason for same. Mat insertions might be gold leaf or linen and may have a separate thin border added to show off the frame. Buy the appropriate rigid insert for a wood or wood-substitute frame. One instance of a rigid liner you may be familiar with is the oval insert for an oval portrait.

B. Backing. Here, backing comes into play. I used to think no backing–either acid-free foam core or rigid thin board Masonite–as I was told the painting needed to ‘breathe’ and passed the news along for quite some time. Now the better preferred advice is to securely affix with screws a Masonite furniture backing to the stretched canvas. On top of that, I use acid-free backing paper to take to the edge with a continuous edge of sealed paper so bugs absolutely cannot get in from the back. (Maybe from the front side.) The rigid board protects the painting from puncture from the backside, prevents small critters from setting up housekeeping in it, and makes a much steadier, sturdier, architectural unit, one not as subject to being bumped or even dropped. My acid-free paper is a light blue (see photo) and I have rarely seen it used by other artists. Go figure!

C. Glazing. Glazing is not normally use on stretched canvas or rigid board paintings, as it is not necessary. The final varnish is the substitute for glazing. Now, exceptions may be made in high handling areas, like museums and for famous paintings like the Mona Lisa.

D. Frame Material. Metal Gallery frames are generally not deemed suitable for canvas or rigid boards. Wood and wood substitutes, in any dozens and hundreds of styles, widths, profiles, plainness or fanciness, however, are the pick. Wood is acidic and may require the use of acid-free paper on the inside of the rabbet (http://www.americanframe.com/blogs/ask-mike/March-2014/selecting-the-right-rabbet-for-your-diy-frames.aspx), so as not to begin discoloration or contamination of the canvas or board surface. Some wood substitutes, while containing less acid, may loosen at the point of the hanger screw and be hard to fill in.

I’d like to address what I mentioned in the introduction and comment on the identity of the work. Often the wooden frame or the wooden portion of the stretched canvas frame become part of the identity of the painting itself. This happens especially in cases where it has been stamped by a framer in country or out, which, along with the aged coloring may mean it started the journey along with the painting. I would be very reluctant to change out such a frame, as this forms part of its provenance or “official papers” which are like a birth certificate. It could actually affect the value and worth of the painting. As well, should your canvas or board ever need restoration, there might have been notes annotated on the frame which would guide the restorer in his work. She might make the wrong decision if she lacks the information that was on the frame. This is not so much the case, of course, with watercolors in metal frames, although annotations on the reverse side are discouraged due to possibilities of bleed-through.

For specific longevity issues of materials, you must contact framers and suppliers. This article has no intentions whatever of supplying total lists, but is wonderful overview in which to fit your particulars in each category as you struggle through the process. Happy journey!!!

Learn more »
No Comment

Acrylics Rock!

From Inside the Studio, Acrylics Day

Painting with acrylics does not require a silver brush, but do be sure you don’t go el cheapo when you buy brushes. You don’t want to forever be picking hairs out of your wet acrylic masterpiece in the less than 10 minutes you have to work on it before that paint stroke dries. You can buy all sorts of shapes for your brushes if you want to, but you’ll always be looking for that perfect little square to pull down a stripe with one stroke or make a squarish something, to slide the wonderful straight edge straight along an edge for a perfect straight line. All who are resistant to painting always quote that old adage, “I can’t draw a straight line.” Don’t mess with me, they are saying. I’m not gifted like you, they actually tell you. Oh? Put out paints. Dip squared off brush into some paint color, Place on canvas, drag straight across with the edge. It worked, didn’t it? So sorry to prove you can paint a line. One further tip on that is to push up to the line, never float over it, which roughs it with additional color. Just keep all the color underneath the edge, and it can’t hop up there to mess it up.

Plant, or mash, as we Southerners say, your square-edged brush upon the edge and drag.

Again. Don’t hold it up in the air this time; we’re not looking for a pencil line, we’re looking for a straight edge under which is paint in a random shape. From this point on, just lather it on below and up to the wet random paint (but never all the way back up to the edge where you will likely mess up what you already had perfect) until you get to the next edge or the end of your passage. You can use just the square edge for a very small point, if you need it, but for the straight edge, match brush edge to edge to be painted. I am being tedious only because I have had to continue in this exact fashion with my students. It isn’t that we are dumb, it is that we have been taught that painting is hard, and we miss the obvious, sometimes.

You can use the same motions (for ladies) that you use for putting on your makeup, soft curving strokes (once you have the edge), some lightly feathered over the thicker ones to connect newer, different colors together seamlessly. Work as long as the paint will let you and you feel you need to. Don’t mindlessly dab. Dabs aren’t strokes, and what are you doing? Do you know the goal for all that dabbing? What was wrong with it the way it was first laid down? You don’t know? Well, then, stop. Another cautionary. Don’t keep pulling paint into new, dry areas from where you put the wet paint down. You are thinning it, and making it worse, not better. Do the logical brushing for the amount of paint you have, stop, and dip your brush in more paint. Feather the add-on into the old lightly, because by now it is drying and has lost its ability to give. Let the old part rest and dry, continue with the wet. If, heaven forbid, you go back over it with watered acrylic, you might lift up a hole, a whole patch of paint that leaves a hole. That is the number one worst error to make, I’m telling you. Can’t correct it, it will leave a bumpy edge all around the hole.

Did we say acrylic is dimensional paint? That means the paint itself builds up and has thickness to it. Oh, Well. You can sand it down and start again.

There are those who like to trip along the bumps of the canvas and spread a little paint here, a little paint there, leaving dry patches in-between. This strategy is not a good one. How do you ever find all those little squares you missed to patch over them? You have to, you know, because unlike watercolor, where bits of paper showing through is considered beautiful, bits of patterned canvas are considered ugly. Now I know some exception will raise it’s beautiful head to prove me wrong. That’s okay. But skipping along with a dry brush has just made your work needlessly more tedious. Just like making a tedious drawing akin to paint-by-numbers drawings with the eyelashes drawn in. And you’re supposed to paint between the eyelashes? I’m sorry, but you must use your noggin, here, and paint in large areas, colors, and surfaces, first. You can’t work from detail down, even if it does anchor you. You have to subtract detail and work with big shapes up.

Check around. Everybody’s saying it.

Now, if you didn’t do this to begin with, try it with your next one. Plan your layout of your canvas, your composition as it’s called, ahead of time. See if you can’t divide it into seven basic shapes. Now you’re cooking with gas. Allrightee, then. Into or onto those seven sections, if you will, you can further subdivide after you’ve painted the main color. All this, and we haven’t even come to modeling. Modeling is a real pain in acrylic. I’ll just say it exactly like it is. Acrylic lends itself to bold contrasts better than slight changes from dark green to lighter, for instance, being as how the paint dries so fast, and you will go back and forth like I’ve seen all my students do, thereby flattening the passage of paint instead of modeling it. You can try slight increments in color, increase of dark (darker color added), or increase of white added into it, lighter, pick one, don’t try both, and feather the edge over the older, drying color.

The toll-painting method of striation of color or variegating it is actually a good strategy. This is called double or triple-loading your brush with 2 or 3 different colors of paint. Don’t glob it all together, space the colors out as you pick them up off your palette. Then apply in short strokes for hair or grass, for instance, re-load, repeat. If you make your strokes too long, the grass will turn to weeds and the horses’ hair to a shaggy, strange breed. Think how hair is actually done on your head, in overhanging layers.

Now, then, I’ve taken you way beyond your limits for today, telling tales and jokes to lighten the seriousness of doing acrylic painting. No matter how serious our intents are, we won’t get there without funnies and breathers and laughing at ourselves and our teachers a little bit. That’s right, you can laugh at me, too. I can help because I’ve made all these mistakes at least once. Don’t be afraid of making mistakes, or too sensitive about it. That slows you up so much and makes you hard to get along with. It’s not that big a deal. You can paint over what you did, too. When I say that, you don’t have to paint over everything. Just the things you think are bad wrong. It’s better to leave some paint alone and go from where you were. New starts make new mistakes. When layering in acrylic, make sure your under layer is bone dry first.

Thank you for reading my eBook, Acrylic Painting Techniques Easy(ier). link I try to break it down to its simplest components for easy access. I can complicate anything, so if you have questions to help me complicate the matter, just ask!

Learn more »
No Comment

EBook Watercolor Painting Techniques Easy(ier), Article #1, Distinctly Watercolor

Personality and Nature

Knowing the nature of watercolor ahead of time would help the would-be painter in his quest. When you are starting out, you really would profit from overview about the nature of the watercolor beast. First of all, watercolor has been around since the cave men, in ancient Chinese dynasties where artisans painted on silk. It is not a new phenomena or a craft craze, but a time honored type of fine art, like oils.

Watercolor has fallen in and out of favor, however, and its current renewal has found some resist and kickback from the establishment. In this regard, it is relevant to know that watercolors painted on archival (acid-free) paper with light-fast watercolor paints is one of the hardiest of the visual arts media. It has known its number of top-notch, museum quality artists over the years, one being J.M. W. Turner, the famous English watercolorist who strapped himself to the prow of a ship during a storm to render the effects afterwards in paint.

Painting watercolors is fun and productive, and easy to begin if you have an overview that includes the following seven peculiarities of it, or said, another way, if you know seven ways it is different from the other media.

The Seven Differences of Watercolor

1. Wet. All paint is wet, but in this medium, you supply the water, its carrier, whether you add it to dry or semi-moist cakes of color, or to wet paints from tubes. Watercolor tubes are smaller due to the high tinting strength of the pigment in the tube. You need to add water to the paint to give it its luster, its glow, to awaken its transparency. Watercolor paint plus water is called a wash, and washes can vary from 1 % pigment all the way up to 100 %. This is more than just a technical fact, it is what gives the medium life. You could say watercolor is born once the paint hits water. Water is the vehicle without which you can do very little. In spite of this, every year I encounter students who try to add water stingily, by the drop. Fear of lack of control puts a stranglehold on watercolor painting. In fact, you could say the only bad watercolor is a dry-looking one (but there’s probably one more). That’s what my Polish instructor, Leon Jonczyk, from Munich, Germany taught about watercolor.

Another implication of the wetness of watercolor as a separate medium is that water is probably more responsible for carrying your paint than even your brush is. You can’t say that about the paint in any other medium. More watercolors are ruined by over-stroking the paper with the brush, than by doing nothing once wet paint is applied. Back and forth fidgeting will even scrape holes in the paper.

Most of the names of the strokes include the word wet. ‘Wet-next-to-wet,’ ‘wet-next-to-dry,’ ‘wet-into-wet,’ ‘splatter,’ ‘backwash,’ and its opposite, dry-brush.

2. Losing Control. I don’t think any other painting medium addresses the matter of control in the same way as watercolors. Rarely does a skill require ‘losing’ control. However, this one does. The best analogy would be riding a runaway horse–you have to let the horse start to run away from you, before you can learn what to do with him at each phase along the way. Fortunately in watercolor, although you might lose a sheet or two of paper, you’re not going to get hurt, learning.

Oh, but how new students act as though it will. The overview to this is that you must learn what to do as the watercolor dries. There are appropriate things to do all along the way. This is not a science, so you must learn it intuitively. One good example is that if the watercolor passage on the paper is almost dry but still moist, you can’t put a loaded brush next to it, or into it. It will explode and ruin the nice set to the color laid down.

However, again, ‘ruin’ in watercolor is really temporary. The ruin of one moment is the success of the next, another outworking of less control.

Now it’s time to tell you the other type of ‘bad’ watercolor–that’s the one that is too dry. That means you’ve been working your little bit of water to death and worn out the paper and the color. Overworked watercolor crystals stop sparkling.

The type of control one needs in this medium is analogous to the reins on a horse, knowing when to pull him in, turn him left, right, when to talk to him, when to be quiet. This is why sketches, fun, and a sense of play are truly helpful with watercolors.

3.Non-dimensional. Watercolor paint used in the traditional way is non-dimensional; it won’t stand up on the paper or any surface. No bumps, no bulges, no texture per se. It is a thin, surface medium, and that is not a detraction. It works best that way. You can paint the effect of texture with stippling, dry-brush, and other things, but it is trompe l’oeuil, or fool the eye. Really, if you clump watercolor paint onto your paper, the end result will be a deadening of the color.

This is because the system is designed to allow for the white of the paper to show through. The light reverberates through the applied color and gives a jeweled effect. It is as though light were turned on from behind.

This explains why you should gently caress the paper with your paint infusions and not solely rely on the tip of the brush, but on its side to deliver paint to the painting. This explains why classical watercolor as was taught me in Europe requires that you use only round-ferrule brushes. These brushes hold a lot of water but gently sweep over paper’s surface with its teardrop shape loaded with wash, the tip used primarily to get close to a line, not to make one.

4.Movable Medium. Again, the image of horseback riding applies. As the weight of the different colors varies, so does the movement of the color you have laid down. It means you can add other colors while it is running (wet). You can infuse small or large amounts at the edge or in the middle. You can develop a whole style based on using water aggressively to move paint, as in Charles Reid ‘s drip paintings. An internationally acclaimed watercolorist, he has successfully rendered flowers, interiors, and portraits with his aggressive runs, splats, and drips. I was lucky enough to have hims select one of my watercolor paintings for a Watercolor Society of North Carolina annual exhibit. He works with a huge, round brush and a bucket of water, H2O flying everywhere.

That is why some paint on an easel, instead of flat, to allow the drips to move downward.

5. Transparent paint. Transparent watercolor painting is one type of painting which has no need of white or black paint. Now this is so interesting, because supply houses do dearly love to play to ignorance by offering a Chinese white to watercolor kits. This color does not work the same way acrylic does, or oil. The only way to get a beautiful white in watercolor is to leave the white of the paper showing, as mentioned in another section. All the whites do not need to be solid, they can be intermittent, or soft, light colors. Add more water to your wash, and you come closer to white. If you try to buck the system and add white, three things might happen. You weaken the strength of the pigment. You alter the color that you are using. You turn the white into a blue cast white, because anything lighter painted over something darker is blued.

The transparent versions of these colors are so much more beautiful than the opaque version. Watercolors should sparkle and shine. If you do a full-fledged, multi-layered finished watercolor, you must leave some layers that go all the way to the paper, some with only a wash, some two, and on, to maintain the painting’s luminosity and sense of transparency.

6. Not wysiwyg. All of the other media are more or less additive, and so, they are wysiwyg, or, what you see is what you get. Not watercolor. It changes minutely, hourly. You will never get what you think in your mind’s eye, or if you do, you will have over-controlled your paint. Over-controlled watercolors are just like that type of children–joyless, rigid, not spontaneous, murky, sullen.

7. Moody. All six of the foregoing lead to the last conclusion about the idiosyncrasies of transparent watercolor. Watercolor is like a mood ring that changes colors with you and your mood. If you are feeling frisky, you probably will have a good product that day. If you are anxious, insecure, leave it alone and come back. You will notice the mood by reading the watercolor. Three quarters of the painting might work and that last fourth? It runs counter to all of the rest. You will have already read my eBook, Watercolor Painting Techniques Easy(ier). If not, make sure you do, it is free to download.

This will hopefully provide a base for you as you delve into painting successful watercolors.

Learn more »
No Comment

EBook Oil Painting Techniques Easy(ier), Article #1

STRETCHING COLOR IN OIL MEDIUM

What is an artist’s stock in trade? Why, color, of course.

Color is so important major conferrences are held annually on the colors used in high-end trade markets. Colors are so important that studies are made on their psychological effects on a person’s well-being. Hospitals pick their paints based on them. I have even heard of 6-figure jobs whose primary duty was naming colors, and I’m sure paint stores pay someone to name their colors, big time. What is color, but the separated emissions of white light into a rainbow prism, which in part, depends on the color that is blocked out of your vision range.

That’s why I am so big on both the range and order of my palette of colors and value the tone or tint way over the longevity or archival nature. I try not to do this, but darn. It’s such a big deal that even in my Old Masters’ paintings of darkest darks, I try to bring in a wide range of hues on the dark side as well as the light. I cannot go with one neutral and let it dirty up all the colors. When you go to the light side, I’m especially keen on a kaleidoscopic dose of color, and I specialize in making sure I know the additives to clean up the chroma of a color, while still leaving it toned. (Toned means there exists some grey in the mix.) Today I got an A-plus on a test naming the colors in famous Old Masters paintings. That was fun.

Rainbow emissions of colors have wonderful names like ‘magenta,’ ‘cobalt blue,’ ‘alizarin crimson,’ and ‘phthalocyanine blue.’ In oil painting, these colors come from a pigment base of one of earth’s natural substances or a man-made chemical. The worth of the color is rated on this and the topic of hot discussion in my oil painting circles. This knowledge is invaluable, and yet is only part of the help I give those who follow my trail of color crumbs.

Have you ever wondered why some people’s paintings work like magic, why people rave over the color? Or why some paintings look to you like random spitup? Well, of course there is the subjective element, which could be the reason early reviews on Wyeth’s works were called out by a major critic as a palette using “mud and baby poop,” an opinion that echoed almost all the major art critics used to abstract expressionism and pop-op art that models high school and college teaching on art. They put down not only Wyeth’s realism, but his morality and austerity. Association is a factor in a human’s reaction to color. Taste testers have proven this in non-blind tasting events: when the water is colored orange, people taste orange juice without a drop of orange in it.

Funny, I never had a bad reaction to Wyeth’s subdued colors. I look at them and think, earth, earthy, spare, awesome composition, about this wonderful American artist.

Participation in artists’ discussions for any amount of time will eventually turn to talk of getting the colors all ‘muddy.’ Many courses claim to teach how to avoid making mud in their color mixing. Muddy is best described as the reaction felt when colors are observed as ‘yuck’ colors. The ‘yuck’ reaction happens when the color seen resembles no known color on earth, and not in a good way. In my experience, mud develops from over-mixing colors indiscriminately. One version of mud comes from not perceiving the difference between what are called ‘warm’ and ‘cool’ colors. Just teaching the eye that one distinction could fast-track a student to more radiant and consistent colors. It is then that they begin to clean up all those nondescript paintings they display to sell unsuspecting, well-intentioned, and potential art-loving owners who come with a prospect to buy.

Let’s talk about warm colors. What would you immediately designate as hot? Sunshine, fire, sun-lit grass, molten lava spewed by volcanoes, red peppers. Now you can find a whole group of them by name–they are the cadmium oranges and yellows, the fire engine reds and the neon greens. Color theory teaches that the warmth factor can change simply by who yellow sits next to on the bench. So if alizarin crimson, a cooler red, sat next to ultramarine blue, a cold blue, it would be warm by comparison. Complexity will grow on the foundation of the basics. Think, concentrate for now on what colors pull the object close up, painting with those colors that draw an object forward. They would be warm. Warm red is associated with hearts, love, and also anger.

Then imagine colors pushing a cloud or a mountain back into the distance, like blue and purple, and you have a cool color that helps the illusion of perspective and distance. These colors include blues and lavenders and blue-greens to push an object back. That is why mountains seen in the distance are blue, purple or lavender. Blues are synonyms for depression in some circles, but to me blues are peaceful and restful.

The emotive power of color in conjuring up a feeling or a taste on our tongue should not be discredited. You can memorize colors on tube labels, but that does not order them in terms of warmth. That doesn’t even tell you where or on which color scale it falls.

Back to the very beginning. Not many people know how many colors make up the set called primary. Or secondary. For that, it’s three guesses and the first two don’t count. There are three primary colors–red, blue, and yellow–on one color system, the one most of us use. But is every red primary? There are hundreds of them. Phthalocyanine blue has been re-marketed with an ‘RS’ and a ‘GS’ on the call number to further identify the blue as to the red side or to the green side. Visual images of colors are so important. Call a color by the name that conjures that color up to your mind’s eye, like orange sherbet, or raspberry, so you can navigate more easily among all the foreign oil colors with strange-sounding names, as I’ve mentioned in my eBook, Oil Painting Techniques Easy(ier). link

I personally use a primary palette and a secondary palette, the terms primary and secondary not directly related to the primary and secondary colors at all. On the primary palette are all the colors to the blue side, which would be a lemon yellow, yellow ochre, alizarin crimson, ultramarine blue, veridian green, and some neutrals. Eventually experiential knowledge can be coordinated with book knowledge to ground you in the wonderful world of color.

• colors range from light to dark
• colors conjure up things like tangerine, pineapple, or raspberry
• there are warm and cool colors
• learn your primary, secondary, and complementary colors
• ‘read’ a color for its content, what other colors are in it (it’s a journey)

Once you begin to recognize what hidden colors you ‘see’ in another color, THEN you can begin to stretch your mix toward that color. This will give your color an unexpected excitement. Once you learn complementaries, you can begin to experiment by stretching those to new and exciting combos. Stretching your colors leads to a whole new room in your color house. As does devising your own color wheel.

Start with your own personal favorites and make a journal with samples of these colors. Soon you will be mixing up a storm, and your efforts will no doubt please the eye—and another eye as well as your own. Now you can begin to follow the Hansel and Gretel color trail home to easier and easy oil color recognition, mixing, using, and stretching. And you won’t let anyone talk you into shading every color with black or brown ever again (more in an advanced installment, later).

Learn more »
No Comment

Acrylic Painting – New Kid on the Block

Settling into Acrylics

One of the newest paints on the market, acrylics have yet to pass the 100-year mark for longevity. So we have no proof that they will last, although all indications are in that direction. We do not know yet what the restoration problems will be.Yet they are the number one preferred paint for free time/professional painting artists. The speed of modern life is is probably one reason they are so popular. Also, the desire to commit to an unknown process is fine, as long as it doesn’t take too much time.

The main difference between oils and acrylics is drying time. Acrylics are the fastest of all paints. However, one can buy a medium to add to the tube paints to slow down the drying time. Tubes are the best form the paint comes in, as the acrylics in bottles are thinner and more mixed with other, unknown colors. Tubes are far superior. Most of the strokes one uses depend on the thicker paint which does not run. The fast drying time of acrylics cuts the time for blending and working wet to a minimum, and is therefore best used by fast painters. The other difference is that this paint requires water for thinning and cleanup. Acrylic paints may be thinned with water and used as washes similar to watercolor paints, but washes won’t reconstitute once they are dry. Nor does the paint itself re-constitute. You can peel it off your palette as a thick, slick clump. So while some of the techniques you would use with acrylic as a wash may be similar to watercolors, acrylics do not lend themselves to the color lifting techniques of gum-arabic-based watercolor paints. That swings the painting to the acrylic system, which is an additive system. In that system, you add and cover up, whereas in watercolor, you lift and subtract to regain luminosity. Otherwise, acrylics are a nice, rich and creamy medium meant to be spread thickly.

Acrylic Paint: Wet or Dry

There are matching issues to be aware of, so that you paint the best sorts of strokes for adding onto. For instance, you can’t match a wet patch to a dry patch perfectly. The paint dries lighter than when it is wet. Using striated colors or grades of color, or the toll painter’s trick in trade of double and triple loading colors onto your brush is your best guard against disappointment here. One really good tip is to use a very small amount of white to add to your colors to decrease the transparency they have, and to increase the covering power of the paint. Then you won’t have to layer as much for correction as you would just to add a nuance, a detail, a color you just noticed.

One caution in addition to the quickness of drying time is that some have erroneously been told that you can use acrylic as an underpainting for oils. Don’t use acrylic paint under oils. It dries to a slick finish, and the chemical bonding is not similar, so adherence of layers is more than likely a precursor to delamination. That means basically that your painting falls off. Oops. Layer similar paint films. You can make an acrylic wash and cover your canvas with it so that the drawing you made shows through. The good news is that you needn’t wait long to start painting your thicker layer of acrylics. You can block colors in, you can have separate color piles mixed to work fast. Just remember, little piles dry fast; larger piles stay wet longer.

Softening edges can be tricky, modeling, likewise. I found in my studio that using dry brushing techniques help for that, as well as dry blending techniques, spreading the last bit of the wet edge further in a feathering action.

All in all, acrylic is a very beginner-friendly paint to jump in and start mixing colors. The color names are not quite as difficult as those for oil and watercolor, since they are synthetic products and it is a new medium using readily understandable names. That may change, however, from time to time.

Get you a pie tin and a zippered plastic bag to close it airtight after each session and some of their drying time can actually be saved. I would blow it up and drip a few fingertips of water in it to keep it moistened and ready for use. I’ll have to warn you, however, it’s kind of stinky when you open it back up. That, too, dies down fairly quickly. If it bothers you too much, you can always throw it away.

If you haven’t done it yet:

Download My Free eBook, Acrylic Painting Techniques Easy(ier).


Learn more »
No Comment

SACRED RUINS, THE WATERCOLOR PAINTING

Eyes Are Windows and Windows Are Eyes

Eyes are windows for the soul, they say, and I do believe it. Some eyes beckon you in, and there is reality in the playfulness or life they display. The cornea of the eye is colored beautifully, a testament to divine light, which in its purity scatters all colors. Of course there are eyes that deceive and eyes all murky with the taste of darkness, the evil they have committed, but I’m leaving that thought alone, in favor of my hopeless optimism.

Windows are much like this. I have always loved painting windows. At one point, I was known for painting windows.

Now I have returned to it with this painting of a window on the famed island of Iona, off the coast of Scotland. Iona is famous as one of the most spiritual places on earth. I painted this window recently that called to me from the photos we made during our trip and walk over the grounds about five years ago. Formed from the oldest rocks known, it was once reputed as filled with stone circles of pagan influences. The island’s early name referenced the Druids before Christianity arrived on its shore. Columba, who founded a monastery in Ulster at 25, traveled 15 years in Ireland, preaching and establishing schools and monasteries. When he insisted on keeping a copy of a psalter belonging to the scriptorium, supposedly a bloody battle ensued. According to other sources I read, Columba murdered a man, much like Moses, and was thus banished from his beloved island so far that he could never even see it, and that took him to Iona. I like that story best, so even if it’s myth, I’ll hold onto it.

In any case, with 12 men, he landed and established a center which when we were there, had burgeoned to massive proportions of buildings, outbuildings and nunneries. Of course, they were in varying stages of ruin and repair. The nunnery, where I’m 98 percent sure the window came from, was absolutely gorgeous. How they did all that on an island is the question of a lifetime. The graves were guarded by the most gorgeous Celtic crosses one has ever seen. For some time the Book of Kells, a famous illuminated manuscript, was kept there. Royal burials developed–and include four Irish, eight Norwegian, and 48 Scottish kings–including Shakespeare’s Macbeth. From Iona the Christian faith spread far and wide through the Ionian monks.

Iona is no small deal on the spiritual horizon.

It was here that a standing stone, Lia Fail, the coronation stone of the High Kings of Ireland, was said to have been brought in by Columba as a travelling altar, interesting, as one of the legends of the Stone (Stone of Scone) was that it had carried the Jewish ark of the covenant for 40 years in the wilderness. Also interesting because this stone also figures in my novel, a work of gothic fiction, Stone of Her Destiny, for which I am even now painting what I hope and imagine to be the book’s cover, its debut projected for soon.

Well, from the Stone of Destiny on the Isle of Iona, I point to the stone which surrounds the window in my painting, “Sacred Ruins.” (link) I love the very archaic nature and roughness of the stone, its nooks and crannies which decry the making of slick beauty alone. Let me work this out on paper. I am a proponent of beauty in art. My UNC-Chapel Hill sculpture professor made friendly mockery of me for this, “Joanna thinks art—should be beautiful.” And I do. However, I do not subscribe to slick beauty, like every stroke must be a masterpiece itself. I think there should be random strokes, rough strokes. I think there is beauty in rough terrain, jagged rocks, not just the misty cloud transitions. Beauty in the unexpected colors, the whites trapped beside dark grey. I love the depth of the rock they used, the creativity with which they alternated shapes that accentuated the right section of the window and fitted them together without relying on the knife for beauty of the same size and proportion.

Rough beauty. Broken glass. Themes all through my artwork. The broken. Partial darkness lying beside the prisms of glass which transfer light. Such truth in the juxtaposition. Yes, my aunt taught me about writing letters and how to avoid revealing myself too much in them. She told me to watch out for juxtaposition. So that is now what I am doing, juxtaposing light and dark. Truth and lies. Smooth and rough. Reflective and absorbing. Earth colors and heavenly colors. And exposing who I am and what I love.

For me, these windows I found in Iona are terribly significant, and I will definitely do a series in them. For me, they are the eyes of the soul of a people, in this case, Irish and Scottish people of faith. They are the eyes of those who have gone before who admit to the struggle, the shipwrecks, the wrong, the repentance, the good, the lights which shine in pastel pinks and blues in spite of the gaping holes–for all time.

Nothing is as exciting for an artist as the last thing she worked on. That’s why sometimes I fail to see a few things not put in, because I’m seeing my own vision and can’t yet separate it from the product  turned out. Not bringing the contrast up to where it would have maximum effect is one thing that results. My latest piece, Sacred Ruins, a broken window in one of the mission buildings on the Isle of Iona, was finished at the beach. I had it photographed, cataloged, ready to enter big shows. But then I had to adjust by adding color, and then a few more color washes , until every pane of glass glowed. I believe intensifying and saturating worked, and am pleased with its increased impact.

Iona as a place tops the list for spiritual tone and calls Scots, Celts, Irish, Christian, pagan, and new agers scattered abroad to pilgrimage there among Celtic crosses and thoughts left on tombstones by St. Columba and his monks.

In my painting you see the stones used for centuries to build sacred and private structures, the encasement of the window, the metal work supporting the arched window, and the panes holding tightly past slings of fortune, surviving centuries of neglect. Mirrored in the window are clouds shining beside darkness inside cracked glass, shapes enlivening imagination, a heart, a board, fanciful figures, perhaps. One feels the spirits of those passed on, the mystery and solemnity of dedicated devotion.

I wanted you to feel the rough hewn rock, the lumps, gravel passages, rub your hand over sand. I wanted you to look heavenward at the grace of the new day reflected in glass no matter how aged, cracked, or broken. I wanted you to see the jagged edges of glass that bespeak danger, story, hundreds even, and if you are as fanciful as I am, hark back to the murders St. Columba committed that ended in his exile.

I have just entered Sacred Ruins in a watercolor show, so we will see what comes of it. Thank you for following my creative pilgrimage.

Learn more »
No Comment

Back to Top