Phase 7 – First Sweep at Daniel and His Red Cloak
14 - 12
2013
I remember the order of my painting, from left to right, and I had always planned to lay in most of the lions before starting Daniel, working in a circular fashion that would return to the place I began. I didn’t remember how “all at once” I had painted Daniel. You can tell we are in the first stages of the flesh tones in this photograph. As always, however—and this is integral to my techniques of painting—every layer must have the lights and darks that belong to in an average amount, and this is the system I teach all of my students without exception, because it is the only system I have found that works so well.
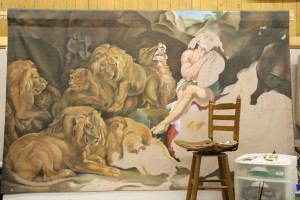
No covering the space with white or any solid color, as that only takes you two steps backward from creating form. This is why any step, even a mistake, is a step forward. Once you have a moderate version of a three-dimensional layer, you build on it by adding lighter colors in the light areas, and darker colors in the dark areas, further rounding an object. You can see I have left my drowsy lion to take a nap while I rough in Daniel’s right upper side and his lower left side. I brought the bar stool from home to lift me higher.
 Somewhere about this time it became obvious that further work would require a scaffolding, so my client had a long bench-like riser made that I could set my chair up on, thus raising me to almost full height of the canvas. It’s times like this when you are glad space is tight and things are jammed together, because that prevented me from inching the chair off the far end of the scaffolding, a possibility which worried my client quite a bit, and which I am quite capable of providing.
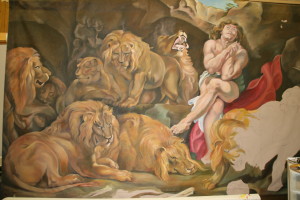
 You can tell I have worked further on drowsy lion in this picture, due to his stand-out golden tones. These more golden tones are not a worry at all, because succeeding glazes will tone the shadow areas. When you glaze, you always keep the end colors in mind and know what your next steps will be in achieving that goal. Meanwhile, I have also added more shading to the lounging lion, left, and corrected his foot and toe shapes. I have begun now to lay in all of the greenish-brown tones on the floor, carefully minding the highlighted areas and the shadow areas. I never lose my differences.
It is also quite obvious that Daniel has emerged quite successfully and that only the toes will be further shaped as well as glaze coats added for emphasizing shadows on the flesh. I will return to work on the hand anatomy with a model, as well, shift the green pants or drape, create more hair. I will also do at least three more revisions on the roaring lion above. I will grey down the teeth even further after a visit from a lovely Dunn dentist made sure I would not make their teeth a fake white. I had them on a 3-point scale and toned them down to a four after his visit.
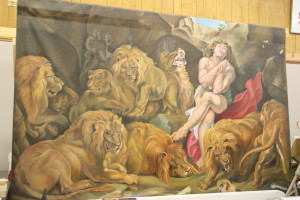
You can see certain “holes” in the painting layer at top in the rock still to do, and none of the shrubbery has been put in. By the time of this photograph, the red drape has received several coats of paint in specific areas. When I say “coats,” don’t think of wall paint and painters. All succeeding layers are added in ways that do not fully cover over any work already done. They only enhance.
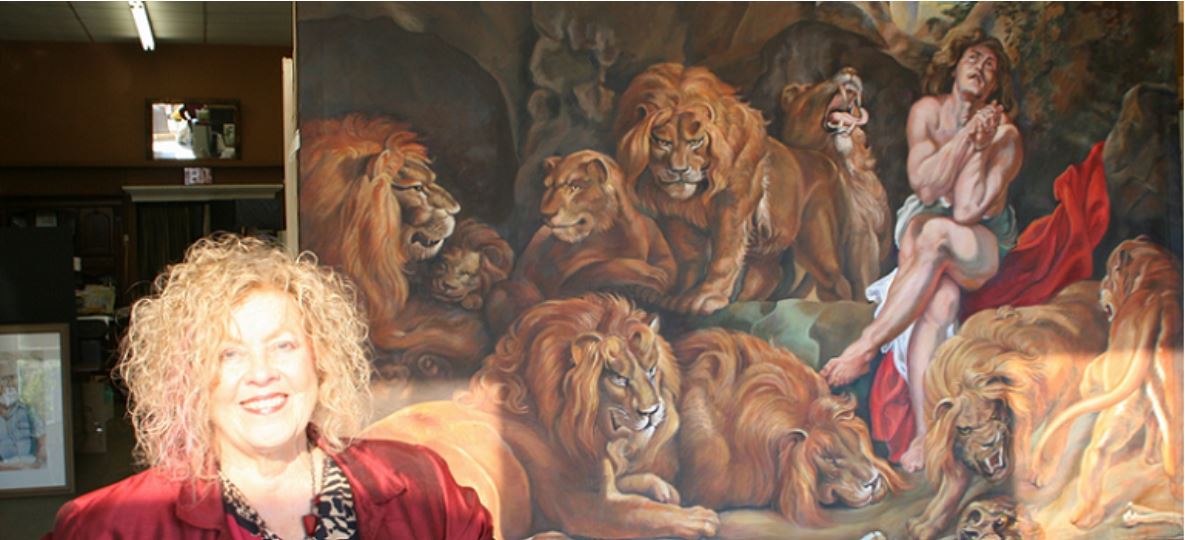
 In this semi-final version you can see that the last two lions, the snarling one and the one seen from behind have been finished the most thoroughly, allowing me time to return to all the problem areas and the two small lions tucked in far left. The lion from behind was amazing; he came together faster than any of the others. In spite of that, he did receive one major butt lift, a case where the eye drug out and extended the foreshortened back at the top. Also, the feet were reworked several times, one pointed out by the client.
Two major teaching tools for the Old Master painter are using squinting and distance, and the distance is two-fold, back up by ten feet is the first, and leave some time in between, the second. As my master mentor in Munich, Bergheim taught me, the best time to catch discrepancies is first thing upon arrival after an overnight, or after an extended break. Another trick I have discovered myself is to walk past it at angles, checking it out the whole way. If an angle is off a little bit, it will seem way off and can be caught this way.
Also, the most beautiful standing lion received a hair lift and the little female to his right needed a whole 5-hour session to set her hair, shade her, and make her look as real as Peter Paul’s. At this point, I am still in love with Peter Paul Rubens, and even though I have quite some ways to go—the bones have yet to be painted, the skull must be worked on, and the lion on the far upper left must have a hairdo and shadows added, I am quite excited at the progress of the painting so far. I have corrected the color in the middle bottom lion to redder, but now it is a little too red. Anyone know what color will correct that? Why it’s complementary, green.
I leave Daniel closed in with the lions for just a little longer.

Leave A Reply
You must be logged in to post a comment.